
How to photograph the International Space Station transiting the Moon and Sun
Introduction
The most challenging photo I have ever taken was the International Space Station (ISS) transiting the Moon. I failed four times before catching it on the fifth attempt. Once I successfully captured this photo, I took it to the Sun. This article is about what it takes to capture this photo. There is a lot of information in this post, necessarily, so bear with me until the end in order to get a complete picture, so to speak.
My method was utilizing gear a photographer might have, whereas a dedicated astrophotographer would be able to do this with less expensive gear but ultra-specialized equipment, which I can briefly cover as astrophotography is a hobby I’m beginning to ease into… but that isn’t what this post is about.

International Space Station transiting the Moon.
The equipment I use is equipment I have from hobby and semi-professional photography and is certainly more expensive than the cheapest options to successfully get this photo. This means if you are already a photographer, regardless of “level”, my setup might be the most practical for you. If you are just looking to get into this and don’t already have much equipment, or any at all, you might be better going with a dedicated astrophotography setup because it’s significantly less expensive. If you aren’t interested in touching on the dedicated astrophotography setup, skip the following paragraph:
While I take a lot of astro photos, I don’t have a dedicated astrophotography setup, yet. I studied aerospace engineering and have a beginners understanding of dedicated astrophotography setups but no practical experience. Long story short, you can purchase a used “dobsonian telescope” for a couple hundred dollars, a used dslr camera for a couple hundreds dollars, an adapter for the camera to the telescope, and then use details from the rest of this post and your practice and proficiency with your setup.
Gear
I would also like to acknowledge that there are non-dedicated astrophotography setups plenty less expensive compared to my setup, but you will still need quite a long lens and a camera with rapid shooting.
My complete setup includes the following:
Marumi ND100000 77mm Solar Filter (only for the Sun)
Laptop + camera to computer cable + Canon EOS Utility Remote Software Free
Smart Phone
Small foam pad (to keep your butt warm)

Here is a mock-up for what my general setup looks like.
Before we get into how exactly you get a photo of the ISS transiting the Moon, we need to make sure you're already proficient at obtaining quality, consistent photos of the Moon without the ISS. I wrote a comprehensive article on how to do this, which you find by clicking this sentence. An element of that post is how to stack photos to make a more resolute image. That isn’t entirely relevant here other than the fact it emphasizes the importance of being confident in taking a great photo of the Moon, which will be necessary to get a great photo of the ISS transiting the Moon.
I won’t talk much about how to get a quality photo of the Moon, that is a prerequisite to attempting a photograph of the ISS transiting the Moon. However, in this particular case, your camera will be firing at a high-speed with a very fast shutter-speed simply because the ISS travels five miles every second, that’s crossing the Atlantic Ocean in as short as six minutes and as long as nine minutes, depending on the location. So, out of necessity, you’ll need to be able to get consistent, quality photos of the Moon shooting at a couple thousandths of a second. And you’ll need to be able to do it in various Moon phases because it’s out of your control when and where the ISS will transit the Moon.
Technical Details
Once mastering photographing the Moon, how do you know when and where the International Space Station will transit the Moon? The easiest way to figure this out is to use the website Transit Finder.
All it takes is to plug in your coordinates and hit “calculate”. The results are listed by date so you know when in the future the transit is. It lists both Lunar and Solar transits and then gives a star rating for each transit based on the state of the transit. Rather than try and explain here, on the Transit Finder website, click “How to use this website”. You will learn a lot about transits and I highly recommend reading it.
Because the International Space Station has a 90 minute day, orbiting Earth about sixteen times in twenty-four hours, you could theoretically have multiple opportunities per day, everyday, to try and get this photo. That’s impossible, realistically speaking. There is a very narrow band of land that you need to take the photo from in order to see the transit, so you’d have to drive hundreds of miles to try and get into the same band when the ISS comes back around the Earth to pass over you and under the Moon again. That’s the reason (among others) it took me a few months and a few attempts to capture the photo.
There are a handful of variables that you need to attempt to control in order to get the shot:
Weather
Weather is clearly the obvious one but the list wouldn’t be complete without talking about it. Other than clouds covering the Moon, pollution also makes a difference. In astronomy and astrophotography light pollution is a big problem. But that doesn’t really matter when photographing the Moon. What matters is any haze that will distort and soften details on the Moon, but especially the ISS. The ISS is so small against the Moon that even if your photo is tack sharp, you could lose a little detail in the ISS due to haze. The only way to manage this variable is to go to a location on the band of transit that is further away from a city or major highway.
Altitude
The further away the Moon is from the horizon, the better. While transit time is longer closer to the horizon (giving you better odds), atmospheric disturbance will soften or blur your image even if you’ve checked all other boxes. You’re taking a photo through far more atmosphere than you would when the Moon is higher in altitude, which is something to look for when evaluating the Transit Finder website. Your photo will be of higher quality the further the Moon is from the horizon.
Time of Transit
This was hard for me to figure out and is definitely the most challenging. The words I would use are, “timing your shot”. Lets say you have a single shot camera and you watch the ISS rise in the horizon at 17,000 mph towards the Moon, and then you need to snap the shot in the window that it transits the Moon. That might as well be impossible.
The Transit Finder website will tell you the time of transit to the hundredth of a second, which changes depending on your location. You need to know exactly what your coordinates will be when you take the photo because those coordinates are used by the website to tell you the moment of transit. If you’re even a couple miles down the band of transit, the time will be off. What also happens is this specific time will slightly change over the weeks and days as calculations become more precise. If the transit lasts 0.64 seconds (like in my above photo), being off by 1 second will make you miss it. That previous number, 0.64 seconds, usually shocks people because of how fast that is. As mentioned in the previous paragraph, the lower the Moon is in the horizon, the longer the transit, but also the worse the photo. If the Moon is sitting on the horizon, the transit duration will be several seconds but the quality will be low. So timing your shot perfectly is critical to get a photo with the Moon at a higher altitude, but you’ll be rewarded with a higher quality photo.
The sneaky thing that I completely missed was knowing that the clock on your phone has a network latency, and it’s different for every phone, carrier, and cell tower. The International Space Station operates on the official atomic clock. This is why I include my smart phone as a piece of gear. My phone’s latency according to the atomic clock was +1.260 seconds… when you have a transit duration of 0.64 seconds, you might as well stay home or get lucky when you shouldn’t. As I write this my desktop latency is +0.254 seconds. Your transit time needs to be based on the atomic clock and adjusted for network latency, which the previous linked page does for you.
Location
I already wrote a few things about this but I’ll put it all together here. When you select a transit that’s near you, the Transit Finder website will show you a map along with an overlay of the band of transit. You’ll be quite lucky to live within that transit’s band so you’ll almost always need to drive to a location. You’ll want to get as close to the center of that band as possible because that means the ISS will pass through the middle of the Moon, giving you the longest window of time for that specific transit. You’ll notice in my top photo that I was quite close to the center of the band but not perfect. If you’re on the very edge of the band then the ISS will barely touch the Moon and the timing of your photo will be a couple hundredths of a second long, good luck.
If you’re not already intimate with a great location along this band, you’ll probably want to scout it out or give yourself a good amount of time beforehand to find a spot. You’ll obviously want it to be public land in an area that isn’t dangerous to you, like the side of a road. You might be able to get away with private land if it’s, say, in a large parking lot at night. You should already know to be on pavement/cement if you are proficient at taking photos of the Moon (start here if you’re not). I usually do scouting on “street view” in Google Maps or Google Earth.
Also, avoid people as much as possible; They will come up and ask what you’re doing, which is a major break of focus.

Transit-Finder example at the base of Mt. Rainier in Washington state. The altitude of the Moon is low to the horizon so the transit duration quite high at 2.48 seconds. The pinned location isn’t on the center line so the line of transit shifted, making your window of opportunity less.
Camera Settings
If you have practiced photographing the Moon and are quite proficient at it, this section won’t be too unique. I can’t stress enough, you need to already take great photos of the Moon. Because the ISS is traveling so fast, your shutter-speed must be as high as possible. There is no true rule to this but I personally aim for at least 3 times the length of my lens. I’m at 400mm so I try to at least go for 1/1200th of a second. Achieving a shutter-speed well above concern is generally easy. If your aperture isn’t as open as possible, then it should be as close to it’s optimal sharpness as possible without dropping below a safe shutter-speed (see the previous link above and search the page for “optimal sharpness”). The brighter the Moon, the easier this is. Keep the ISO as low as possible and only begin to increase it if you absolutely have to in order to get your shutter-speed high enough. Even if you slightly under-expose the image to keep that shutter-speed high, you can go into your post-processing afterwards and raise the exposure level. Keep that shutter-speed high!
Also make sure you’re set to your camera’s high-speed mode so that it’ll shoot as many photos as possible during the transit. My camera shoots about 7 photos per second so with a 0.64 second transit when dead center on the band, that’s only a few photos in transit if I time it perfectly. Given the files are in RAW format, I can shoot about 20 high-speed before my camera lags due to writing speed on the memory card. So I’ll start shooting about 1 second before transit until about 1 second after transit. That gives me about 20 photos in a window of about 3 seconds to catch the transit window that’s likely less than 1 second, if that makes sense. So long as the transit happens inside my window, then I should have a few photos with the ISS in transit or better odds of at least 1 photo if I slightly miss the perfect window.
Post-Processing
I won’t spend much time here because every person has their preferred software and you likely already know how to use it for the Moon. I use Lightroom for just about everything and then I take it from Lightroom into Photoshop if I need to. What I will say is that if you did capture a few photos of the ISS transiting the Moon, then you can merge them into a single photo that shows it’s travel path, like my top photo. You don’t need to, but it’s an option.
Congratulations if you got the photo! It’s a real challenge that requires a lot of focus and it’s a photo that not many people get.
International Space Station - Solar Transit
Now that you’ve successfully achieved the ISS transiting the Moon, why not try it with the Sun? The Transit-Finder website shows those transits as well, it just requires an extra, critical step to make it happen. A solar filter. DO NOT POINT YOUR CAMERA AT THE SUN WITHOUT A SOLAR FILTER! YOU WILL GO BLIND! And if you do it in on your camera’s LCD screen, you will destroy your sensor. The filter needs to be specifically for the Sun. This isn’t an ND10 filter, it’s an ND100000 filter, or something similar. This costs some money for such a specific photo but it’s that much more unique.

International Space Station - Solar Transit
Thank’s for making it to the end :)
How to photograph the Moon my way and with stacked images
Introduction
There are a million places on the internet (probably more) that explain how to get a great photograph of the moon. Even while following tutorials and articles it was still only by trial and error that the quality of my moon shots saw significant improvement over the course of more than a year; I'm sure others can do it quicker. By now I've taken a few thousand shots of the moon... mostly because I've started to take many photographs in a row to stack into one image, more on that later.
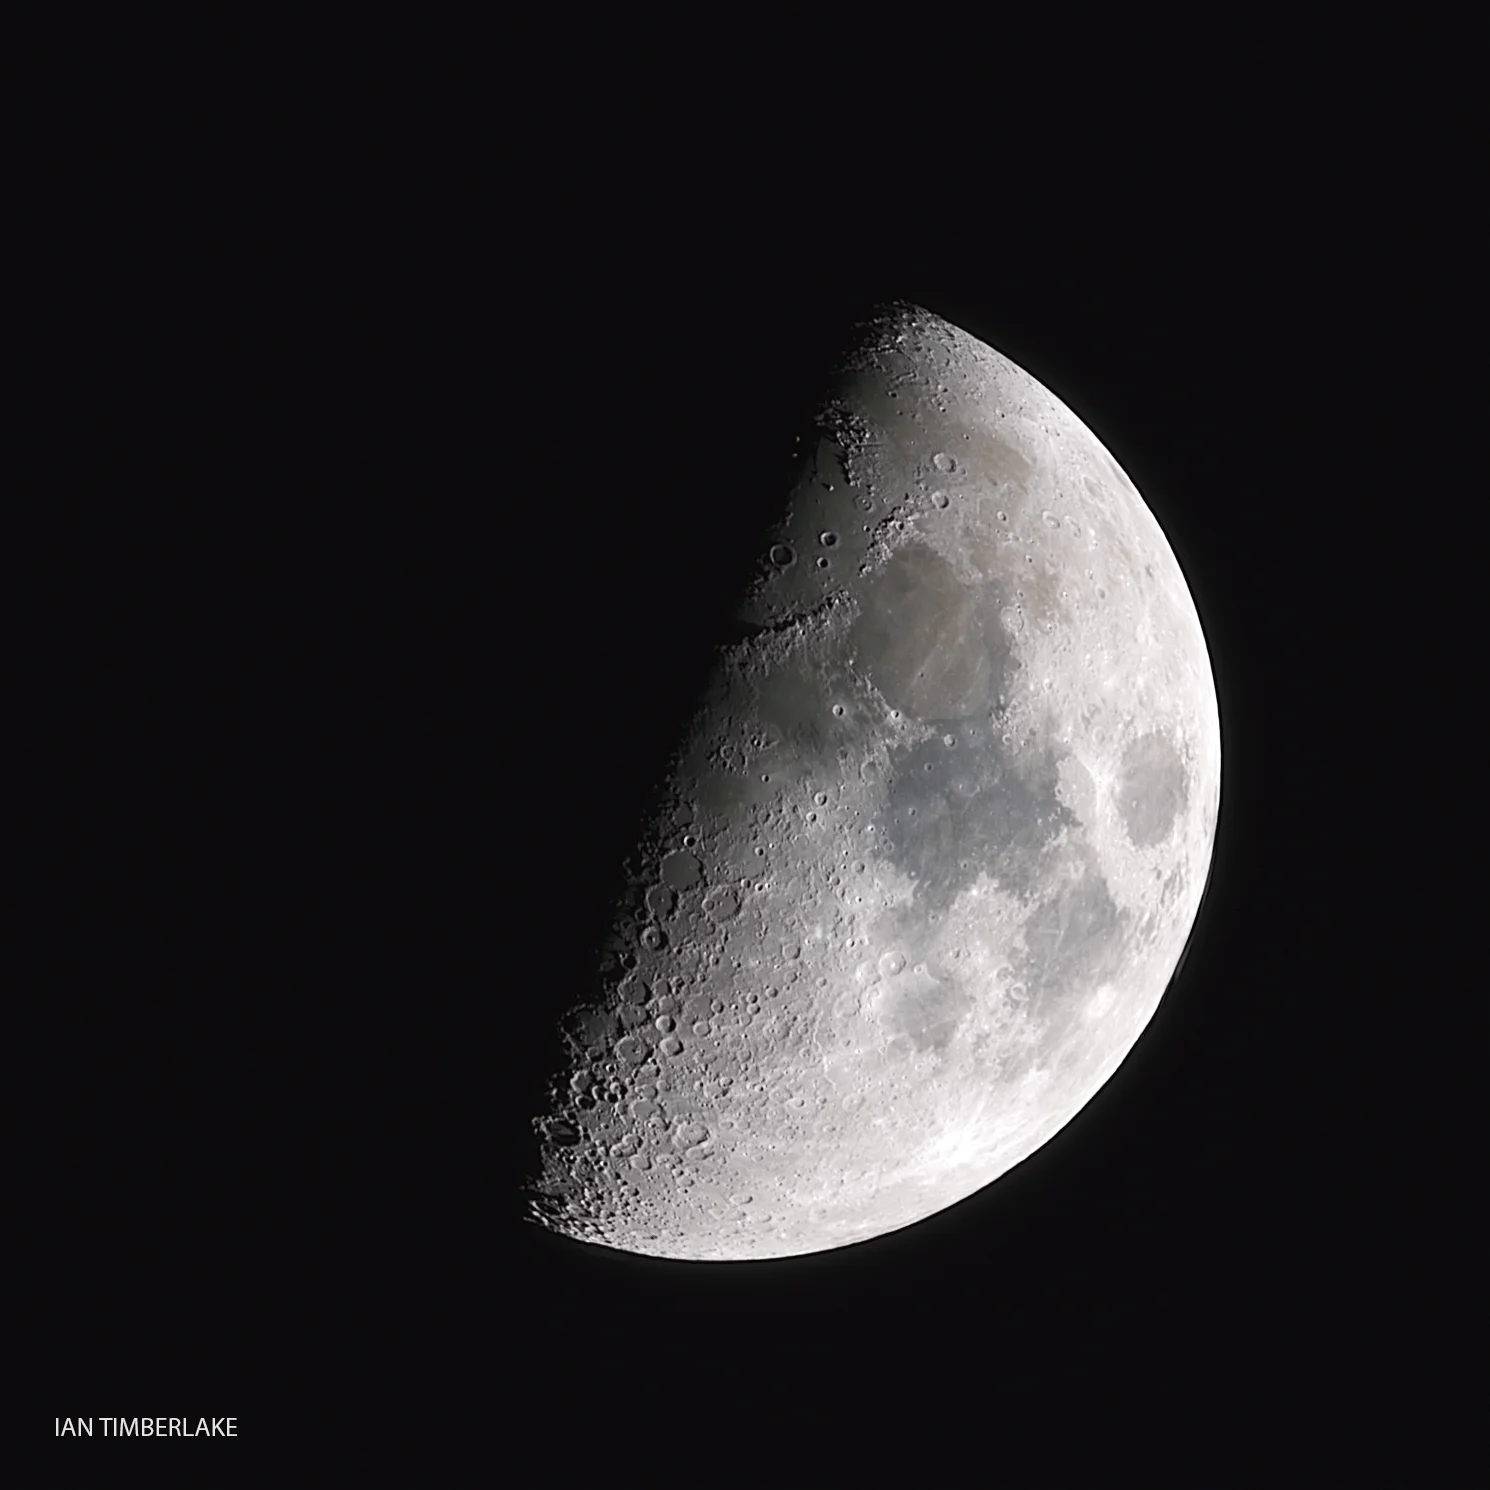
Here is my most recent image of the moon. I will also show you a relative progression of my moon photos, from some of the earliest, all the way to this current image.
Half Moon photograph stack using many exposures and various programs.
First Photograph
The first photo I ever took of the moon with my first DSLR camera was so horrid I deleted it seconds after I took it. I set up the tripod, pointed the camera at the moon with my 18-135mm kit lens, zoomed all the way, and set the aperture wide open and the shutterspeed to 30 seconds. Don't ask me why. Of course the photo turned out to look like a white sun viewed from the Moon, instead. My cell phone did better without me doing anything. The Moon is bright.
A vast majority of articles out there will spit out the same exact exposure numbers. The cynic inside of me thinks this is a positive feedback loop of people reading an article, taking a photo, and then writing an article. The settings I read everywhere are as follows: 1/125th sec, f/11, ISO 100, manual focus, tripod, 2 second timer, 200+mm lens (I use a 400mm). Don't get me wrong, a lot of people use these settings and get great photos, but it took me a few months to realize this isn't a rule and that some of my best images were with other settings. In fact, my preferred method is different than the above.
Beginning with the commonly written settings, the first photo I took of the moon that I felt I could share with friends is the following image. I was quite proud of it but knew it was well below the quality of many images I saw online. This was taken 1 March 2017.
My first moon photo I felt I could share with friends. Taken with the most common cited exposure settings found online: 1/125th sec, f/11, ISO 100, 200+mm lens, manual focus, tripod, 2 sec timer.
The same night I also took a photo exposed for the shadow side of the Moon. These were obviously different settings because the exposure needed to be for the shaded side. Feel free to laugh.
Taken the same night as the above photo. This is an exposure for the shaded side of the moon.
Second Photograph
About two weeks later, when the above moon phased into a full moon, I tried again using more-or-less the same settings as written, deviating only slightly. Not only is the Moon out of focus, but I came to realize that a full moon doesn't express craters as well because the sunlight is hitting it directly and not casting any shadows across its surface. The result was an extremely flat, out of focus image. For fun, I decided to mark the Moon landing sites.
My second photo of the Moon that I was willing to share with friends. I have to admit, pretty embarassing but an important step in learning. I also marked the landing sites of the Apollo missions.
Third Photograph
I subscribe to SpaceWeather.com, a website that keeps track of stellar events in the present and near future. Noticing a Jupiter-Moon conjunction coming up, I tried to get them in the same photo. Here is the result. Note that there is only slight improvement on photographing the moon.
Jupiter-Moon conjunction
Experiments and Tactics for Success
This is probably the most important step, at least for me. After throwing away everything I read online, in an attempt to immitate others, I decided to start from scratch and simply ask myself what variables could lead to specific problems. I had taken hundreds of photos with more-or-less the same techniques and I had become quite frustrated. The wild west presented itself.
Shoot in RAW format: I shoot in RAW about 100% of the time and was using it in all the above photos, but it's worth noting.
Use mirror-lockup mode: This is a setting within the camera that flips up the mirror on your first press of the photo button and then takes the photo on the second press. This helps eliminate vibration in the camera that might be caused by the mirror flipping up and down when you take the photo.
Turn off lens stabilizer: Lens stabilizers are amazing bits of technology, but when you're in a super solid set-up, like what we're doing, the stabilizer fights itself and can over-compensate. This results in a less sharp, even blurry photo.
Get a sturdy tripod and get it as low to the ground as possible: I had been using my tripod extended to my standing height, which increased the risk of wobble in the wind as well as time it took for the camera to settle after touching it. I now have the legs all the way in and based out as wide as I can and I do my best to tighten and lock down every single joint. This requires sitting on the ground. Often I'll use a foam pad to keep my butt warm.
Find steady Earth: Find a spot that's as steady as possible, like concrete. Not a wooden deck, not hard packed dirt, and please not grass.
Use a laptop for focus: Maybe this isn't accessible to certain people, but I decided to move from using a corded remote shutter, to plugging my camera into my laptop and using the free EOS Utility software provided by Canon. There's also an app for your phone if you have a WiFi or NFC enabled camera. I found this absolutely crucial for achieving focus. Focusing on the Moon is harder than you think. You can either auto focus on a very distant object in the horizon and pray to the Luna Goddess that you don't so much as breath on the focus ring (some people tape it), or you set everything up, zoom in all the way, digitally zoom in if you have an LCD screen, and manually turn the ring until the edge of the Moon is sharp... both of these are obviously possible but harder than you think. The EOS Utility allows me to go full screen on my laptop and focus it one tic at a time via the utility itself. I never need to touch the camera from this point on (unless to reposition the Moon in frame).
Find the optimal sharpness for your lens: Every lens paired with every camera has an optimal sharpness aperture. There is an aperture size that achieves a measured result in sharpness, unique to your camera and lens. After much research online and personal testing, the optimal aperture size for my setup was between f/5.6 and f/7.1, most said f/6.3 but it's very difficult for me to see a difference in this range. But there is absolutely a difference in sharpness when compared with the often recommended f/11 when photographing the Moon.
High shutter speed: The faster your shutter speed, the better freeze you'll get with your subject. The Moon sweeps across your frame faster than you think so I got a double benefit when I found the optimal aperture size allowed me to have a much faster shutter speed, better freezing the Moon as it moved. Because the aperture had the most impact on in-focus sharpness, I varied the shutter speed based on what phase the Moon was in (how bright it was). On a full moon, at f/5.6, ISO 100, I was getting a properly exposed shutter speed of 1/1250th of a second, an order of magnitude faster than the recommended 1/125th sec... a far cry from the 30 second exposure on my first ever Moon photo.
Remove all filters: You should never use a polarizer at night, it's useless. However, I was using a UV filter on my lens as a lens protector. In the event I scratched my "lens", I could remove the filter and put a new one on. UV filters don't really do anything but they are good barriers for your expensive lenses. With that said, they aren't nearly as perfect in optics as almost all lenses so you'll get a sharper photo if you take it off.
Photograph the Moon high in the sky (and with zero haze): The haze bit is obvious, but if we're going to check all boxes then it must be acknowledged that the closer the Moon is to the horizon, the more atmospheric disturbance you'll see. With a very fast shutter and taking many photos, this shouldn't be a big problem.
Take many photos: There are always variables out of your control, or variables that you can mostly control but not always. This is why you take dozens of photos in a sitting and select the best one.
Image Stacking: see below
Image Stacking Specifically for the Moon
Now we're getting to the part that takes your stuff to the next level. Before attempting this, you must be getting consistently sharp photos of the Moon in one sitting using the methods above or whatever methods you find to work best for you. You must have sharp, defined edges in each image for the computer to recognize. You will need at least 100 photos of the Moon in a single night; the more the better.
I am by no means a true master of the following methods, there are astrophotographers out there that have been stacking tens of thousands of images, sometimes hundreds of thousands of images over the course of a decade. The following Windows programs are specific astrophotography tools designed for you to sharpen images of the Moon:
1. PIPP
In the computer file, select all the Moon photos you took (100+, the more the better) and drag them into PIPP.
Check "Solar-Lunar Full Disk".
Go to the "Processing Options" tab and deselect "Convert Color to Monochrome" and change the "Cropping" to a size smaller than the frame of your photo that you want all images to stack to; make sure the crop is square (unless you don't want that).
Go to the "Quality Options" tab and check "Only Keep The Best Quality Frames". Once you check this the program will rank the highest quality frames (based on its algorithm) and you type in how many of the best ranked ones to use. If I imported 200 photos and chose 80 frames to keep, then it'll take the best 80 frames of the 200. The more photos you take, the higher the quality your stacked photos will be. You could take 1,000 photos and stack the top 100, which would be better than stacking the top 80 of 200.
Go to the "Output Options" tab and select "Tiff" as the export format and then "Create Subdirectory" so that only exported PIPP files end up in the folder.
Go to "Do Processing" and click "Start Processing". This will take a few minutes on your average computer.
Once processed, click "Open Output Folder". The output folder will have named each frame by quality. If you took 200 photos and chose the top 80, you'll see that the best frame it chose is listed as "100%" and then the percentage drops from there based on assessed quality. The higher the quality of your original images, the higher the percentage will be for each frame. As a reference, all of these sorted frames that were outputted should be in the very high 90% range.
2. AutoStakkert!3
Select all of the Tiff files that were outputted from PIPP and drag them into the AutoStakkert!3 window.
A window should pop up to show a single reference image of your Moon. On the left, click "Place AP Grid". These points are the references the program uses when stacking. It'll analyze each of these boxes for each photo and line each of them up incredibly well.
Just above that button is the "AP Size" box. The bigger the boxes, the less well it'll stack. If the boxes are too small and you have thousands of them, it could crash your computer. If your computer can handle smaller and more boxes, then do it, but you'll get a good image if you have the size set to 80-120 and it shouldn't be too hard on your computer unless it's especially slow.
In the first box you dragged all of your files into, the upper right corner has something called, "Frame percentage to stack". This will now use its own algorithm to sort out the best frames. In the first of the four boxes, type in your percentage number. This percentage should be pretty high because you've already done a level of sorting in PIPP. So something like 85-90% will be good to add a little refining within AutoStakkert!3.
Click, "Stack", in the lower right. This should take a minute or so.
Go back to the location of all the exported frames from PIPP and there should now be a folder that starts with "AP-[something]", and inside should be a single Tiff file of the stacked images from AutoStakkert!3.
3. RegiStax6
Drag the single Tiff image outputted by AutoStakkert!3 into the RegiStax6 window and check the box, "Show Full Image". This program can also align and stack but I've personally had better results with AutoStakkert!3... again, I'm not a master with these programs. We'll use RegiStax6 to sharpen the image without adding a ton of noise because it's a stacked image.
Click a spot on the Moon, preferably an edge with some craters so that you can see some contrast and detail. This should highlight a specific area of the Moon as a preview to the sharpening you're about to do. This will save on processing load on your computer.
Adjust the 6 layer sliders on the left to modify sharpness. Don't increase the sliders too much because a little will go a long way. You'll be able to see the result in the preview you selected.
Click "Do All" button in the top left to apply your desired sharpness to the rest of the image.
Click the "Save Image" button in the top left and save it where you'd like in whatever format you prefer. Note that 16-bit is better than 8-bit. If you'd like, you can now import this image into an editor of your choice, like Adobe Lightroom, if you wish to do more minor adjustments like fixing the white balance and adjusting the saturation to bring out a little bit of color. Yes, the Moon has color and it's beautiful.
Conclusion
There is a lot of information to digest in this post but it reflects the complete timeline of my progress photographing the Moon.
Remember:
Start at a baseline based on information you've gathered.
Try to eliminate every possible element that could lead to a soft/blurry/unfocused image.
Practice, practice, practice towards consistency so you can get quality stacks.
The most difficult photo I have ever taken is the one below, the International Space Station transiting the Moon. Here is the page on how I took this photo and how you could as well.